Tuesday, 6 October 2015

Filming Our shampoo advert (Marissa's lesson)

Today, after a lot of preparation and planning , we finally got to video/film our advertisements.Our group was advertising our shampoo product (Good for you Shampoo).Using our previously made storyboard , we were given 45 minute periods to film , coming back to the room to upload footage and then go back out again.
We were told to take 3 shots of each scene , so that we had back up material (in case the first take had gone wrong) and we had to ensure that we included a variety of shots whilst filming the different scenes.
My group managed to film everything that we needed to film within the first 45 minutes , which gave us the chance to get a head start with uploading all of our footage on to the editing software (Adobe premiere cs6).once we had imported the footage on to the software , our external hard drives and onto the Computers hard drive (C) we got a chance to start with some basic editing.We had to backup our footage on to the computer drive (C) and onto our external hard drives , so that we could reduce the chance of losing important files.
Once our footage was imported onto the software, we had the job of looking at all of the clips , selecting the best one out of each take and then set where the chosen clip would start and end when played.This enabled us to shorten the clips (to fit the 15-30 second limit) and also to reduce errors and mistakes.This also made the clips combined look more professional and overall smarter.
Next week , we will be able to start adding effects and sound to our video .

Monday, 5 October 2015

shot list


  Shot List
1 )      Long shot of Damon walking down the spiral staircase.
2  )      Steady shot of Damon walking down the corridor.
3  )      Mid shot of Damon walking and the clown standing behind him.
4  )      Wide shot of clown behind Damon.
5  )      Wide shot of Damon running from clown.
6  )Wide shot of Damon running from clown (again)
7  )    Close up of clown with shampoo
8)      Over the shoulder shot of Damon giving the shampoo to the clown.
9)      Wide shot of Damon giving shampoo (again)
10)  Close up of clown putting on shampoo.
11)  Wide shot of clown turning normal after shampoo.

12)  Extreme close up of shampoo at the end of the advert.

Friday, 2 October 2015

Photographing 6 objects


Today we had to take 6 or more photos for our advertisement of products that could be relevant to it.

Our first task was to do a quick photography quiz about the different rules of photography and certain aspects about a camera.Such as what the letters P ,A,S,M stand for (Aperture,Shutter speed,Program and Manual).

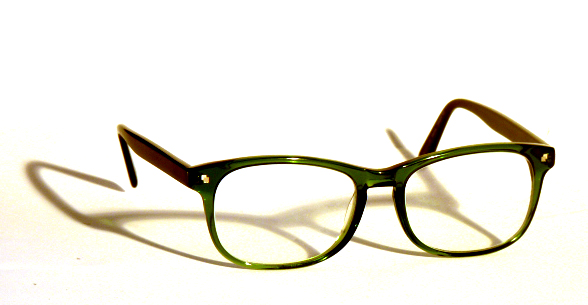
The 6 objects i bought in for the photography session were a model horse , some perfume , a teddy bear , a hat , a shampoo bottle and some glasses.To take these photos we had to set up a table along with two pieces of A3 paper ; one being pinned to a back wall to create a curve in the paper.This helps reflect more light and also reduces shadows.The next thing we had to set up for the photo shoot was a 'red head light' , (usually used for filming and producing videos) this light was shone onto the paper to add extra light to overall produce a better quality photo.This is also known as a 'Seamless Background'.Seamless Backgrounds act as backdrops that don't have any edges, and they are usually made of one continual piece of material or paper.We use a clean white background as it makes it a lot easier for editing in photoshop.

After setting this equipment up we had to set up the tripods and attach the cameras.Using the knowledge of tripods we had earned from video lessons with Marissa , we quickly got set up and were ready to take the photos.The main aim was to take at least 6 - 12 photos .We took it in turns to take the photos each time remembering to make sure the camera was focused by pressing down the shutter button once and then taking the photo.We also had to ensure that we changed memory cards so that no ones work got mixed up.

To shoot our photos we had to set the mode on the mode dial to 'program' or 'P' .Then we had to go onto the menu option on the camera , select ISO and then change this to 100.a lower ISO takes a better quality image.


In our second session we were taught how to edit the photos briefly.Instead of using editing techniques such as adjusting the brightness or contrast, we were taught to use 'Levels' and 'Curves'.
To begin with we had to open up one our images onto Photoshop using 'Browse in bridge' found in the file option.You then have to double click on a photo of your choice and this will open the file/ image onto photoshop ready to edit.Next you have to go onto 'image' and 'adjustments' then 'levels'.A graph will appear with 3 little triangle cursors.Move the black and white cursors to the start/end of each peak on the graph, then move the middle arrow until the background goes white.
To use Curves you have to again go onto 'image' and 'adjustment' then onto 'Curves'. When this opens up another graph will appear; again move the triangle cursors to the peaks.Set a point on the middle of the line and another one further down , continuing with one close by to this drag the line.This again like 'levels' should adjust the brightness and contrast on the picture.An alternative tool to help is also the white coloured pen shown underneath the curves graph.Click this and then click areas on the picture where you would like it to be brighter and for shadows to be reduced.This also helps your photo to appear more white.


Overall what Mark was trying to teach us here when editing photos was to reduce the use of the brightness and contrast tool to edit photos ; instead you can use the levels and curves graphs which produce better quality photos and adjust the light levels of the photo equally so your photo looks more professional.

Below are my images after using levels and curves to edit them . Also to get them to the size they are we had to use the marquee tool (learnt from Owain's lessons) to surround the area of the photo i wanted and then going on to 'image' and 'crop' to get rid of the unwanted areas of the photo.


Wednesday, 30 September 2015

Library trip


In our tutorial session with Faye, we printed off our labels and headed down to the library to collect them.We were shown how to use the printers by swiping our cards in the scanner and selecting the document that is available.We were also shown around the library were the black and white and coloured printers are and which sections contain the media books that we will be able to use on our course.We were also asked to find a book and take a photo of it . I chose a photography book and an anime book (Death note).We were to have a look around by ourselves and view the books and Dvd's on offer.We were told basic information such as opening and closing times , how much printing credit we get and how many books we can take out (including when we will have to return them by).


Photoshop - (Choosing Fonts) and designing a label

Today in our first session with Owain , we went on to the website DAfont.com and chose  3-5 ,or more fonts that would be suitable for our video advertisement product label.We did this by typing in our product name , choosing the fonts and then print screening these .Then i pasted them onto Photoshop , used the marquee tool to crop them and then saved this file as a JPEG.

I think the fonts that i have chosen match the freak or unique theme and will suit my product as they are all a bit strange and 'horror' like.Each font that i have chosen is different and unique.One of these fonts or one of the fonts that my other group members have chosen will be designed as a label onto our shampoo bottle .Again our product will be called 'Good For You Shampoo'. The slogan could also possibly be designed using a similar font.You can also change the colour of these fonts on Photoshop but i have yet to learn that skill.


For the second session , we were asked to design the label for our products.Using Photoshop with the previous skills i had learnt in Owain's lessons we chose a font , pictures off google images and extra information/details.In this case i used ingredients and a bar code for scanning.Discussing with my team we decided upon the dimensions and the idea to put a clown onto the label.I myself have decided to also include a picture of a woman with healthy looking hair which is also the message that we are trying to express throughout the advertisement.I combined the two images to portray a before and after look , as when you have unhealthy looking hair it can make you feel different and even ugly.So my idea is that with this shampoo, it can make you feel more confident about your hair and overall a lot happier with yourself in general.


Tuesday, 29 September 2015

Storyboard work for video advertisement

Today in our second session we made a spider gram of our ideas for our video advertisement.Our ideas are unchanged from yesterday's session with Faye as we still want to use the idea of advertising a shampoo product using a clown and a student (Damon). We wrote our proposals' and then went on to complete our location recce's. We had to fill out 2 as we are using 2 locations for filming.Our group name we decided upon after much debate was Toleda which is mine , Toms and Damon's first 2 initials of our names.Finally our last task was to create at least 8-12 slots on a storyboard of our advertisement.


Video Advert Proposal

The product we are planning to sell is a brand of shampoo for women.Our idea is to advertise the shampoo using a clown secretly following someone to get the bottle of shampoo.The person wont realise the clown is there until the end when the clown is sat in a public area looking sad . The student/ person then walks over to the clown and hands her the shampoo.The clowns' hair and face then changes back into an ordinary person and then the product will be shown along with the logo at the end.There will be 2 actors throughout the advert.We are aiming our advert at 12 years plus.We might use a ghost effect for the clown.

The props we will need are a green wig, shampoo bottle without the label on, yellow shoes , a clown mask and headphones.The equipment we will need is a camera , tripod , microphone , headphones and an SD card.The locations we have decided upon are the spiral staircase , the corridor next to it and the seating area on E floor.The obstacles we may face by doing this are other students / staff walking past in the areas.Another obstacle could be the sounds that could disturb our filming.

The editing techniques we plan to use are sound effects, music,we may also need to cut some of the footage out to fit the 15-30 second limit for the overall advert.The music and sounds will add more suspense and emotion to the advert, making it more enjoyable to watch.

I think this advert could also turn out to be comical in ways but also unique.At the end of the advertisement , there will be a close up shot of the shampoo bottle which will have a designed label on it (which will be completed in Owain's lesson).

The label will have a clown on and maybe a background that is quite dark and mysterious.Along with this will be the Good for you shampoo name and a slogan.